Mint Design Blog


Turn your look with a handmade crochet beret using this free pattern that combines classic style and modern crochet techniques beautifully.
Crochet with Olga Dyvinets!!! offers a wonderful Free crochet beret pattern that brings classic style and comfort together in one easy-to-make accessory. This beret is a timeless piece, perfect for adding a touch of elegance to any outfit while keeping you cozy during cooler days.
Free Crochet Beret Pattern for Cozy and Stylish Headwear
The design features a soft, rounded shape with a delicate texture created through simple stitches. Its lightweight and breathable fabric make it comfortable to wear, while the slight slouch toward the edges adds a fashionable, relaxed look. A small stem on top serves as a charming finishing touch, highlighting the beret’s classic style.
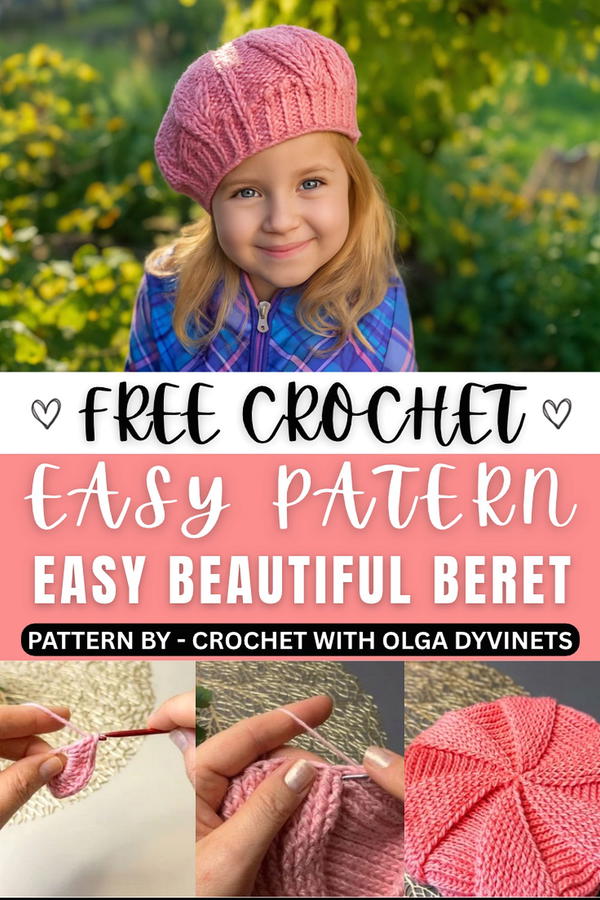
This versatile accessory fits most head sizes thanks to its flexible construction, making it ideal for everyday wear or as a special occasion statement. Beyond its stylish appeal, the beret makes a thoughtful gift for friends or family who appreciate unique and handmade items.
Balancing elegance, coziness, and practicality, this beret adds a refined charm to any wardrobe. Its understated yet distinctive design ensures it stands out as both a decorative and functional piece that can elevate various outfits effortlessly.
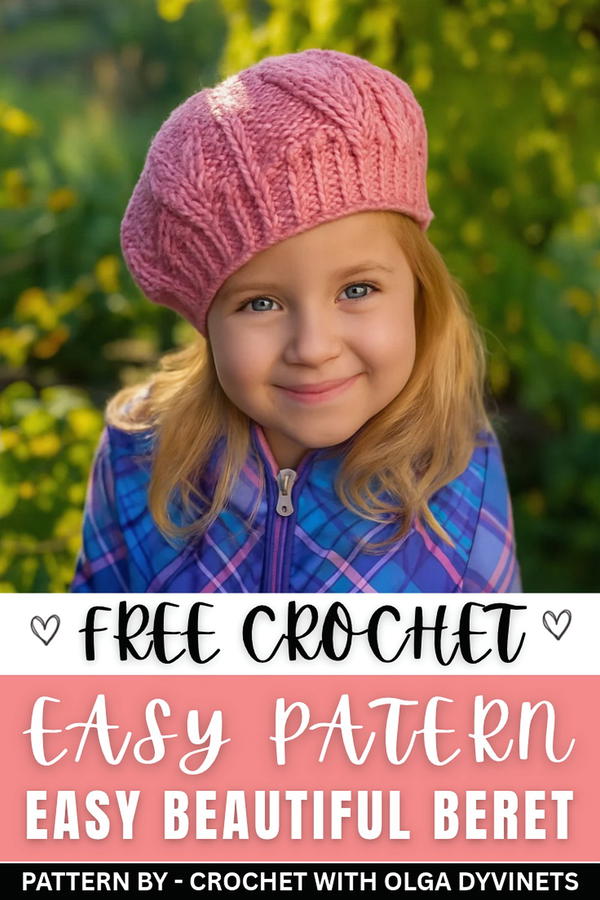
Velvet Mohair Crochet Beret
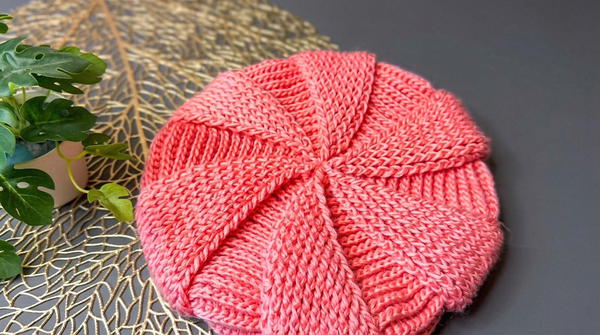
This crochet beret features a soft, textured fabric created with front and back post stitches, forming subtle “petals” radiating from the center. The design is sized for an adult head (approximately 51 cm circumference) and includes structured shaping at the crown, a smooth transition, and a classic ribbed edge for a snug fit.
Skill Level
Intermediate
This project uses standard double crochet as well as post stitches (front and back post double crochets), with controlled increases and decreases to shape the crown and rim. It is suitable for crocheters who are comfortable working in the round, tracking stitch counts, and maintaining consistent tension.
Materials
- Yarn: “Velvet Mohair”
- Composition: 25% alpaca, 30% mohair, 45% cotton
- Length: 100 g / 195 m
- Quantity: Slightly more than 1 skein
- Hooks:
- 3.12 mm hook – for the main body of the beret
- 3.0 mm hook – for the ribbed edge
- Additional Tools:
- Stitch marker (to mark the beginning of rounds)
- Scissors
- Yarn needle for weaving in ends
Stitch Abbreviations
- ch – chain
- sl st – slip stitch
- dc – double crochet
- fpdc – front post double crochet
- bpdc – back post double crochet
- fpdec – front post double crochet decrease (2 sts together)
- bpdec – back post double crochet decrease (2 sts together)
- st(s) – stitch(es)
- rnd – round
Special Stitches
Front Post Double Crochet (fpdc)
- Yarn over, insert hook from front to back to front around the post of the indicated stitch (rather than into the top loops).
- Yarn over, pull up a loop, yarn over, pull through 2 loops, yarn over, pull through remaining 2 loops.
Back Post Double Crochet (bpdc)
- Yarn over, insert hook from back to front to back around the post of the indicated stitch.
- Yarn over, pull up a loop, yarn over, pull through 2 loops, yarn over, pull through remaining 2 loops.
Front Post and Back Post Decreases (fpdec, bpdec)
- Work as for fpdc or bpdc, but around two adjacent posts:
- Yarn over, insert hook around first post (front or back as required), yarn over, pull up a loop, yarn over, pull through 2 loops.
- Yarn over, insert hook around the next post in the same manner, yarn over, pull up a loop, yarn over, pull through 2 loops.
- Yarn over, pull through all remaining loops on hook to complete the decrease.
Useful Tips
- Use a stitch marker: Mark the first stitch of each round to track your progress and avoid losing count, especially during increases and decreases.
- Check measurements: By rnd 16, the beret’s diameter should be about 26 cm. Adjust tension or hook size slightly if your diameter differs significantly.
- Maintain ribbing alignment: The beret features alternating fpdc and bpdc to create a rib texture. Keep this alternation consistent for a neat visual effect.
- Avoid tight joins: When joining with a sl st at the end of rounds, keep the join slightly loose to avoid puckering at the crown.
Pattern Instructions
This beret is worked from the top (crown) down, then shaped, and finished with a ribbed border.
Crown
Rnd 1 – Starting Ring
- Create an adjustable ring (or ring formed by wrapping yarn).
- Ch 2 (counts as first dc).
- Work 12 dc into the ring.
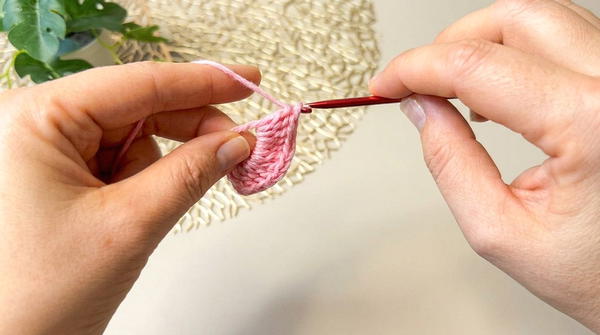
- Pull the ring tight to close.
- Join with a sl st into the top of the ch-2.
- (Total: 12 dc)
Rnd 2 – Relief Increases
- This round forms 24 relief stitches (post stitches).
- Ch 2 (does not count as a stitch for the post pattern; you may treat it as a placeholder).
- Around each of the 12 dc from rnd 1, work 2 post stitches, alternatingfpdc and bpdc as follows:
- Example sequence:
- Around 1st dc: fpdc, fpdc
- Around 2nd dc: bpdc, bpdc
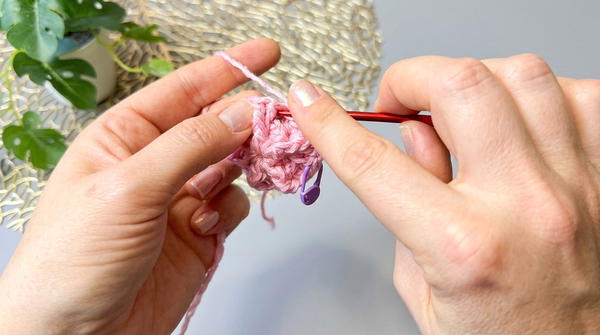
- Continue alternating sections (front-post section, back-post section) around.
- Example sequence:
- Join with a sl st to the first post stitch.
- (Total: 24 relief stitches)
Rnd 3 – Structured Increase
- Ch 2 (optional as a height placeholder).
- The stitch count will increase from 24 to 36 stitches.
- Work the pattern:
- 1 relief stitch (fpdc or bpdc) in next st,
- then 2 relief stitches in the next stitch (increase: 2 fpdc in one fp; or 2 bpdc in one bp, maintaining pattern).
- Repeat this sequence (1 relief st, then 2 relief st in next st) around the entire round.
- Join with a sl st to the first relief stitch.
- (Total: 36 stitches)
At this stage, you will see 6 sections forming, alternating between fpdc and bpdc “petals.”
Rounds 4–16 – Expanding the Petals
From rnd 4 onward, you will increase by one stitch in each section per round, maintaining the alternating front-post and back-post pattern to emphasize the 6 petals.
General Rule for Rnds 4–16
- Work in continuous alternating sections:
- A section of front-post stitches (fpdc “petal”), followed by a section of back-post stitches (bpdc “valley”).
- In each round, within each section, increase by adding one extra post stitch:
- Example concept:
- If in the previous round you had 5 fpdc in a section, in the new round you will have 6 fpdc, achieved by placing 2 fpdc around one post in the section.
- Apply similarly to bpdc sections.
- Example concept:
- Maintain the overall pattern so that:
- Front-post sections remain front-post.
- Back-post sections remain back-post.
- Continue this controlled increasing until rnd 16.
By rnd 16, the diameter of the beret should be approximately 26 cm. This forms the full crown width before shaping downward.
Rnds 17–18 – Stabilization
These rounds define the shape and allow the fabric to relax without adding width.
Rnd 17
- Ch 2 (optional placeholder).
- Work fpdc over all fpdc and bpdc over all bpdc, with no increases.
- Join with a sl st to the first post stitch.
Rnd 18
- Repeat rnd 17:
- Ch 2 (optional).
- Work fpdc over fpdc, bpdc over bpdc across all stitches.
- Join with sl st.
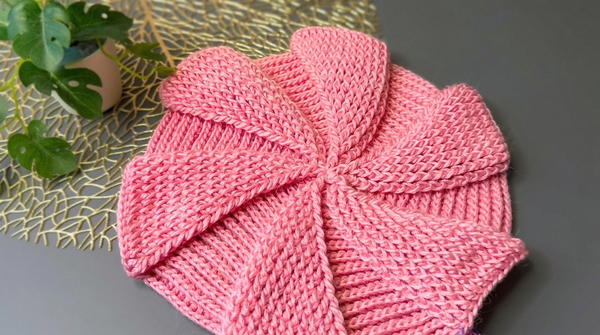
These two rounds stabilize the crown and prepare for subtle narrowing.
Rnd 19 – Decreasing
Here you begin reducing stitch count to gently taper the beret from the widest point toward the head opening.
- Ch 2 (optional placeholder).
- Work decreases as follows:
- In fpdc sections: work fpdec (front post double crochet decrease) over every designated pair of fpdc where narrowing is needed.
- In bpdc sections: work bpdec (back post double crochet decrease) over every designated pair of bpdc similarly.
- Maintain the alternating fpdc and bpdc sections while decreasing evenly around to reduce diameter.
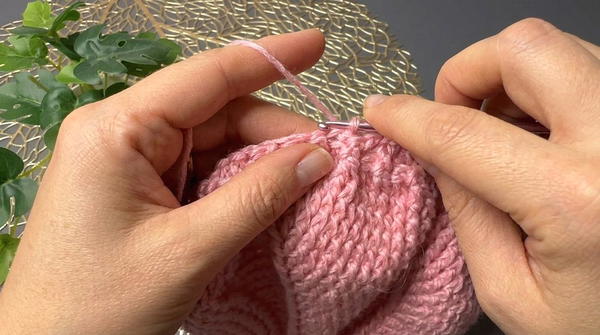
The exact decrease placement should be balanced across all 6 sections so the beret remains symmetrical. Avoid clustering decreases in one area.
Rnd 20 – Ribbing Preparation
This round prepares the stitch count and structure for the ribbed band.
- Begin with ch 2 (optional).
- Continue working fpdc over all fpdc and bpdc over all bpdc, but:
- At the start of each “petal” section, perform an additional decrease (fpdec or bpdec) to further narrow the circumference.
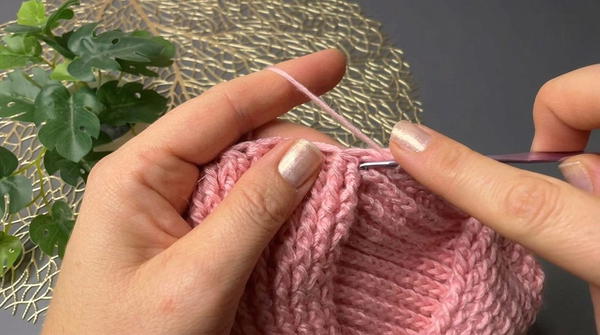
- Finish the round with a balanced and consistent number of stitches suitable for the ribbing (the exact number depends on your personal tension and previous increments but should comfortably fit a 51 cm head circumference).
Rnds 21–26 (Approx.) – Ribbed Edge
Switch to the 3.0 mm hook to create a firmer ribbed band which grips the head comfortably.
Rnds 21–26
- Do not increase or decrease.
- Work fpdc over fpdc and bpdc over bpdc around the entire circumference.
- Continue this ribbing for approximately 6 rounds or until the band height is at your preferred depth (typically 3–4 cm).
Ensure the ribbing is even, elastic, and comfortably snug.
Finishing
Final Round
- After completing the final ribbing round, join with a sl st to the first post stitch.
- Cut the yarn, leaving a moderate tail.
- Pull the yarn through the last loop to secure.
Weaving in Ends
- Use a yarn needle to weave in all ends on the inside of the beret, securing them within the post stitches for durability.
- Smooth the beret into shape and lightly block if desired (follow yarn care instructions, especially with mohair and alpaca content).
Conclusion
This velvet mohair crochet beret creates a refined accessory with gentle structure and a soft halo from the mohair blend. The radiating petal texture combined with the classic post-stitch ribbing offers both visual interest and a secure, comfortable fit. Adjusting the depth of the ribbed edge or the number of stabilization and ribbing rounds allows customization to individual preference while retaining the overall design.