You can build your own standing desk using these DIY plans. They are easy to understand and don’t require much skill to complete. Get back that extra energy to finish up those trickier tasks throughout the day, and just stand up once in a while to give your body and mind a break. These 14 DIY Standing Desk Plans are easy to use and customize and can be built with minimal skills and tools. They make a great addition to your home office or workstation.
Add some variety to your office or workspace with these DIY Standing Desk Plans. A standing desk is a great way to add variety to your office or workspace. Of course, there are many ways to make desks that suit the needs of everyone. If you have trouble finding time to work between your other daily obligations, then it may be time to consider one of these plans. There are 14 simple and easy plans available, so whether you have always wanted a workstation at home or you are looking for the perfect studio desk for an office that has proven itself inefficient in increasing productivity, this is the perfect solution. You will love having something that even other co-workers can't come up with as an alternative.
DIY Standing Desk Plans
These 14 DIY Standing Desk Plans are an up-to-date guide to building a standing desk with these detailed DIY standing desk plans. The plans are easy to understand and don't require much skill to complete. Get back the extra energy to finish those trickier tasks throughout the day, and stand up once in a while to give your body and mind a break. These plans also save you from thousands of dollars you would usually spend on expensive, flashy standing desks but don't provide you with the health benefits you should get from using them.
Benefits Of DIY Standing Desk Plans
If you’re already familiar with the benefits of standing desks, then you probably know how expensive they can be. But don’t let that discourage you. If you want to stand up and work more often, then there are plenty of DIY standing desk plans available for you to try out. These plans are intended for just about anyone who wants a simple and affordable way to improve their health and productivity levels. They can also be adapted for a wide range of spaces, from home offices to cubicles or schools. So, if you have any problems with sitting too much or back pain while sitting, then these 14 DIY Standing Desk Plans might be just what you need!
Convertible Standing Desk
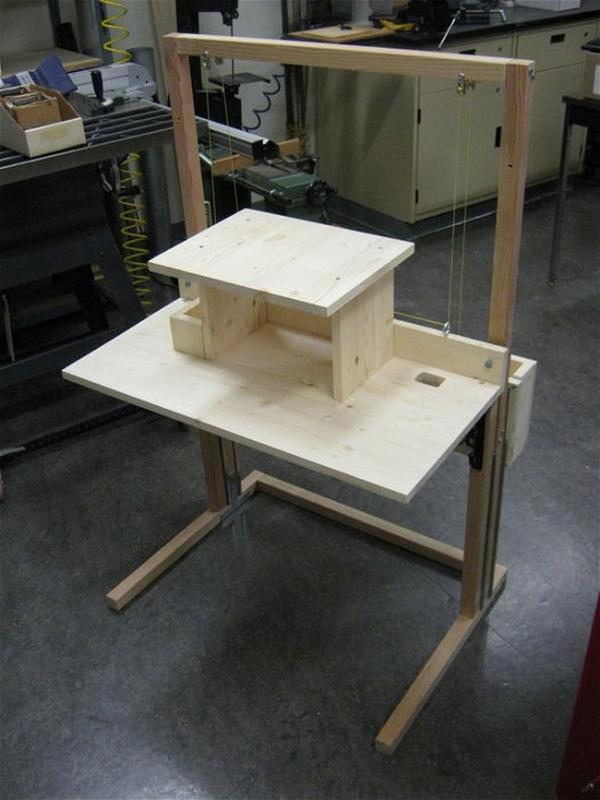
This Plumber Pipe Standing Desk plan will walk you through every step, from preparing the workspace to attaching the pipes and mounting the desktop. This easy-to-follow plan will help you build a strong, beautiful desk that you can customize with your own touch. This Desk is a super-strong standing desk, easy to build, and does not require any tools. The best part is that you can customize it with your favorite pipe fittings! This pipe standing desk plan is an easy DIY solution that doesn’t require much in terms of tools or materials. This is a great project for beginners and anyone looking to start standing at work. This standing desk will provide you with many hours of comfortable standing and keep your back healthy!
Skill Level: Beginner
Materials: Wooden Board, Mending Plates, Iron Pipe, Black Iron Couplings, Black Drywall Screws, Danish Oil
Tools Needed: Drill, Saw, Sander, Speed Square, Pencil, Rag, Clamps
Tips: If you are tall or short- don’t worry! They provide instructions on how to make 42”, 48’, and 30’ desks.
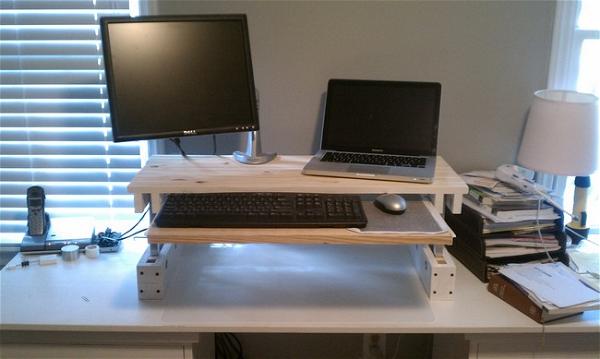
Cheap and Easy Standing Desk
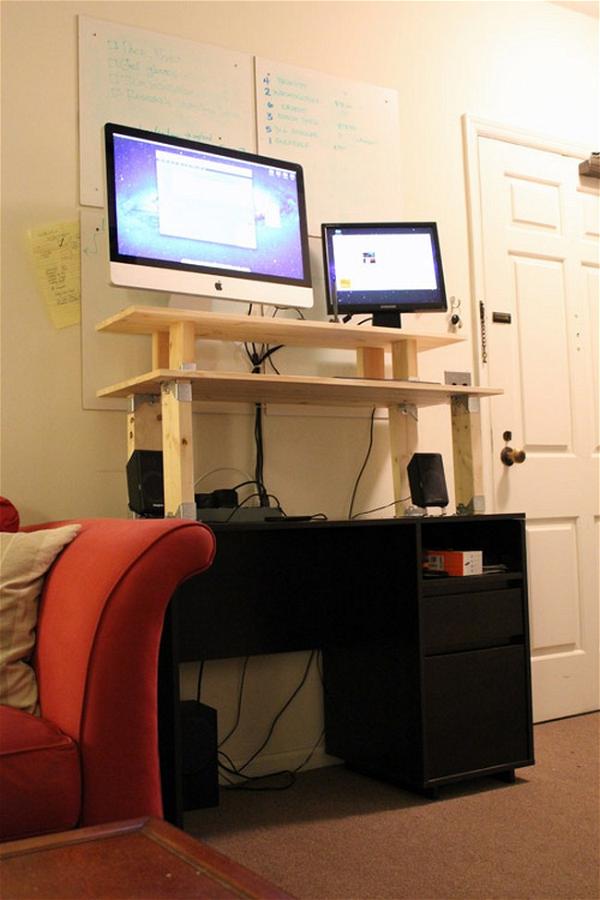
If you are looking for an affordable standing desk plan, then this Cheap and Easy Standing Desk plan is perfect for you! The ultimate do-it-yourself guide to create a standing desk that is inexpensive, easy to make and can be used with your current office chair. This standing desk is quick and easy to build, yet has great functionality with its large work surface and pull-out keyboard tray. This standing desk can be used in multiple configurations to fit your changing needs, from laptop to drafting table. Built with simple materials and basic tools, this standing desk is sturdy and perfectly functional!
Skill Level: Beginner
Materials: Pine Boards, Braces, Screws
Tools Needed: Drills, Saw, Sander
Tips: If you are a total woodworking beginner and don’t have a saw, don’t worry. Home improvement stores often have an option to trim boards for you.
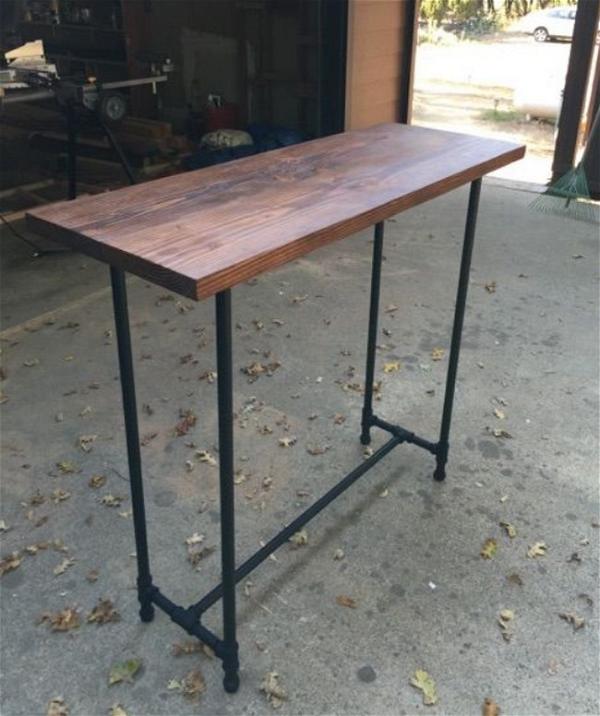
Steel Pipe Standing Desk
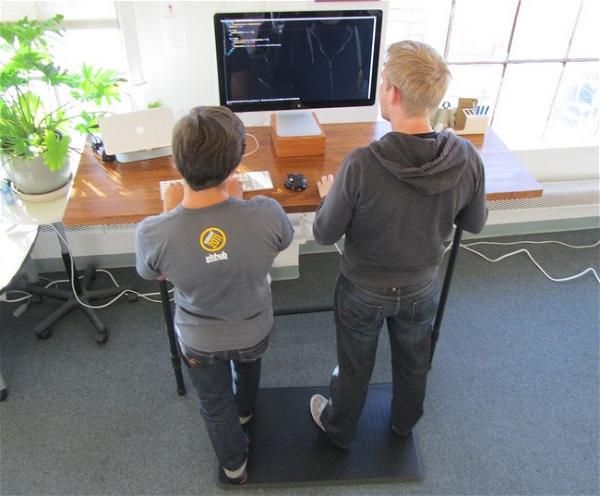
This simple Standing Desk is great for beginners because it uses an already cut piece of wood as the actual desk! This Steel Pipe Standing Desk is great for beginners because it uses an already cut piece of wood as the actual desk! The pipes are easy to assemble- most of the work is connecting them to the desk and then making the whole thing look aesthetically pleasing. It doesn't require any fancy tools- only a drill and a few screws. The desk is adjustable, so it can fit anyone who wants to use it! This desk allows you to get the feel of welding without jumping into a project that will take more time than you have to spare. The options are endless, so let's get started with building a standing desk today!
Skill Level: Beginner
Materials: Sturdy Wooden Countertop, Wood Screws, Steel Pipes, T-Joints, Flanges, End Caps, Extensions, Paint, Primer, Wood Stain, Polyurethane, Pipe De-Greaser
Tools Needed: Drill, Paint Brush, Sandpaper, Gloves, Tarp
Tips: It’s up to you what wooden countertop you want to use. The writers of this blog said they used an IKEA NUMERAR Oak kitchen countertop which was great quality and only $129.
Wood Standing Desk for Your Cubicle
Let's convert your cubicle desk into a standing desk! This weekend project can be easily modified to any dimension and will help you fit some activity into your day while on the job. This Wood Standing Desk for Your Cubicle is the perfect solution, and all you'll need is a basic understanding of power tools, woodworking tools, wood finishing tools, and wood glue. Perfect for beginner to intermediate level woodworkers. This plan will show you how to make an inexpensive standing desk in two hours or less. It is perfect for those who love DIY projects. The plan provides clear pictures and directions, so it's very easy to follow. You can build this standing desk out of materials you have around the house. To build one today and start reaping the benefits!
Skill Level: Beginner
Materials: Wood, Wood Stain, Polyurethane, Ponderosa Panels
Tools Needed: Circle Saw, Drill, Clamps, Sander
Tips: He provides some great tips on how to properly stain wood!
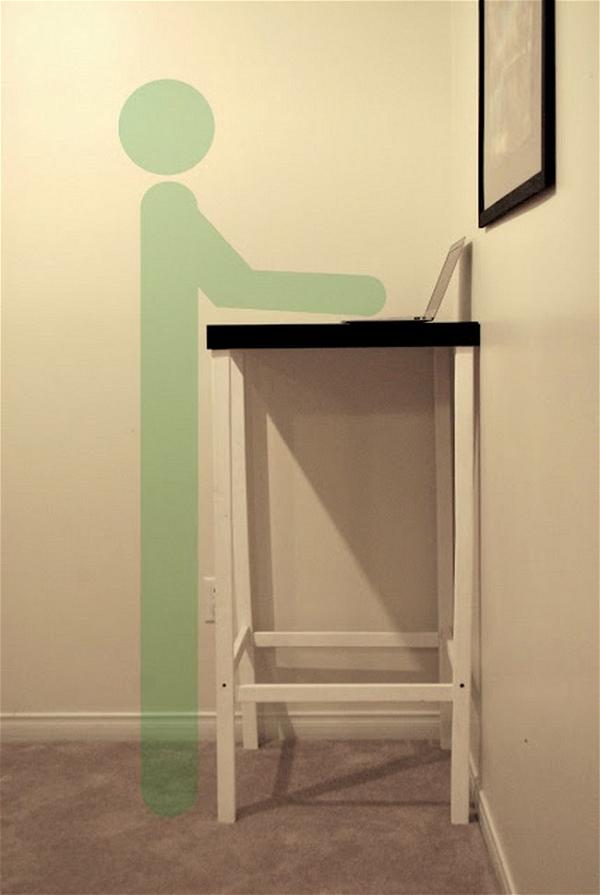
Wrap Around Standing Desk
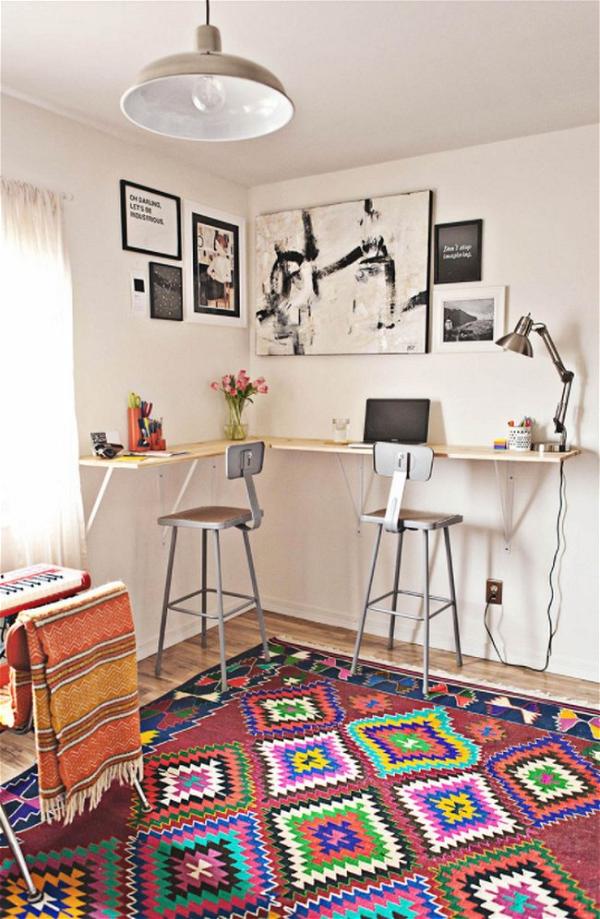
Wrap Around Standing Desk focuses on building the desk in a way that creates the most space for itself, not for the room around it. It will show you how to build a desk that wraps around your wall and doesn’t take up space on either side. The plans will go over the basic tools and materials needed, as well as an overview of what tools you’ll need throughout each step of the build. This wrap-around standing desk has all the benefits of a sit-down desk and then some — it provides more surface space for your laptop or tablet, easier ergonomics with motion, and how can you beat the feeling of standing while you work?
Skill Level: Beginner
Materials: Pine Board, Shelf Brackets, Screws
Tools Needed: Power Saw, Power Drill, Level, Sand Paper, Hand Sander, Polyurethane, Rag, Brush
Tips: You don’t have to use pine boards; you can substitute another kind of wood. Keep your wood on the lighter side though, so that the brackets can effectively hold it up.
Industrial Farmhouse Stand-Up Desk
This farmhouse stand-up desk plan is very easy to build for anyone with intermediate woodworking skills. Showcasing a unique farmhouse design and welded industrial pipe fittings, this stand-up desk is a great way to give your space the midcentury feel it deserves. Choose from the many colors of wood provided in this plan to customize this table to your own home. In addition to the cost savings of using scrap lumber, this desk also features industrial-inspired components such as metal piping and riveted leather straps. This farmhouse stand-up desk features all of the advantages of a stand-up desk. It has ample storage, plenty of work area and keeps your posture in a much more healthy position!
Skill Level: Intermediate
Materials: Wood, Pipes, Floor Flanges, Iron Threaded Tee’s, Iron Caps, Screws, Spray Paint, Walnut Stain, Polyurethane, Wood Glue
Tools Needed: Milter Saw, Kreg Jig, Drill, Sand Paper
Tips: Keep in mind that standing desks are not one-size-fits-all. Base your material measurements on how tall you are.
Large Standing Desk or Kiosk
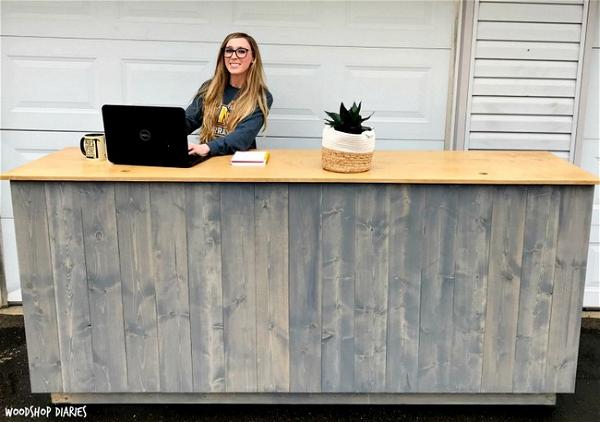
If you have a small niche to fill in your office, the Large Standing Desk could be the perfect fit. For those who want a large standing desk without having to buy one, these plans are for you. A lot of standing desks only offer you a limited amount of space. That is not the case with this Large Standing Desk or Kiosk plan. This desk is built to last and was originally meant to be a kiosk but functions well as a desk that can fit in your home office. Build a large standing desk or kiosk with these plans and a bit of lumber. This design is perfect for a wide variety of uses, including for use in larger space; such as lobbies, offices and conference rooms.
Skill Level: Advanced
Materials: Wood, Screws, Plywood, Edge Banding, Wood Glue
Tools Needed: Miter Saw, Circular Saw, Drill, Kreg Pocket Hole Jig, Nail Gun
Tips: This desk is huge but the size is easy to modify if you love the design, but don’t have room for something like this in your home or office.
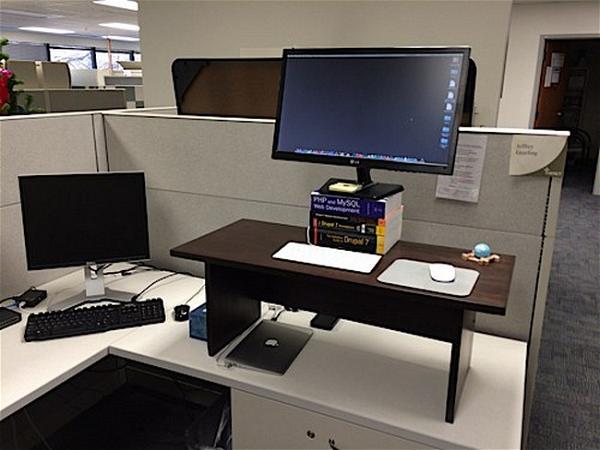
Pipe Standing Desk Converter
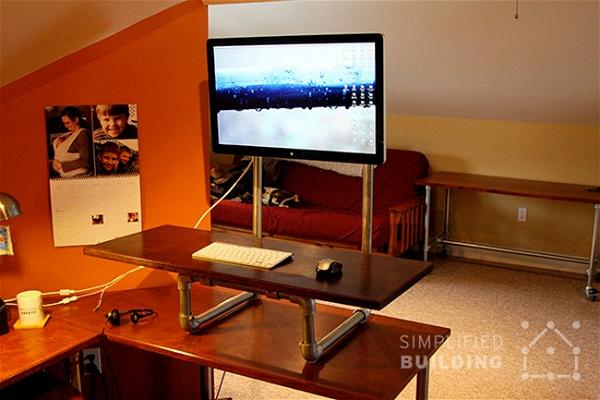
Pipe Standing Desk Converter Hello there! Are you interested in a standing desk but not ready to commit fully? This standing desk converter is for people like you. Made from the black pipe, this desk will fit on top of your existing large table or desk. Folds flat and stores away easily, too. This plan is very simple and costs much less than a full standing desk conversion.
The Pipe Standing Desk Converter is also great if you only need a standing workstation for one person who plans to occasionally switch between sitting and standing while working. The Pipe Standing Desk Converter is a plan for a small standing desk that can be built on top of your normal desk. The finished product will have a footprint about the size of a sheet of paper and you can use it to raise your monitor or laptop as you stand to work.
Skill Level: Beginner
Materials: Klee Klamp Fittings, Pipe, Brackets, Rail Support Fittings, Velcro, Screws
Tools Needed: Screw Driver
Tips: A large part of this plan requires you to have a detachable computer monitor. If you don’t, this is not the plan for you.
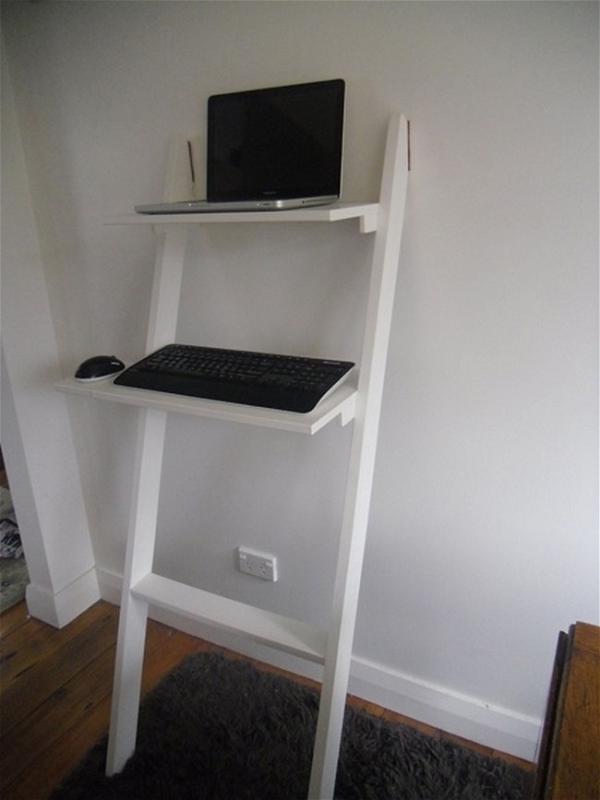
DIY Adjustable Standing Desk
Do you like working at a standing desk but don't want to spend all that money? Look no further, the DIY adjustable standing desk is sure to meet your needs. It is cheap and easy to make. This plan presents the DIY Adjustable Standing Desk for a great, affordable, and eco-friendly way to raise your workstation or tabletop. Assembly is super-easy, it only takes ten minutes to put together this sturdy standing desk. This unit adjusts from sitting to standing position in mere seconds. The desk features a brown felt material that is nice and smooth for drawing on, as well as a full-sized writing surface on the underside of the platform. Get up off your butt and work smarter, not harder!
Skill Level: Beginner
Materials: Klee Klamp Fittings, Pipe, Brackets, Rail Support Fittings, Velcro, Screws
Tools Needed: Screw Driver
Tips: A large part of this plan requires you to have a detachable computer monitor. If you don’t, this is not the plan for you.
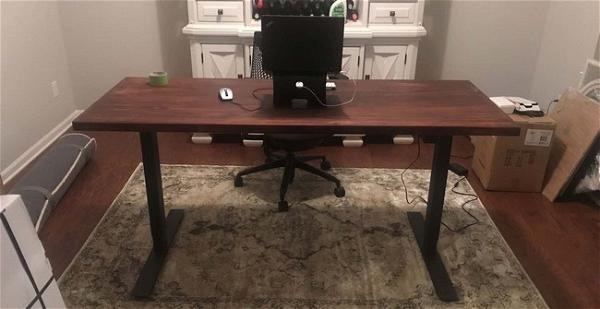
How To Make Your Own Adjustable DIY Desk
Sometimes you need a desk that's tall but not too tall, so you can sit easily in a chair and type on it. Sometimes you need a desk that's short so you can raise your arms and work more comfortably at it. Or sometimes, you don't need a desk at all! This plan will show you how to make an adjustable DIY desk so you don't have to worry about it. And if you do need an extra table in your home office, this can be reconfigured quickly and then used as an extra table or counter space later. You can take pride in making your desk yourself, and it'll be especially gratifying knowing how affordable it is to pull together. With just a few simple materials and tools, you can create the perfect workspace for you, no matter your personal working preferences
Tools Required
- 1-1/14" spade bit
- ⅛" pre-drill bit
- ⅜" pre-drill bit
- Air compressor
- air nailer
- Drill
- Impact driver
- Mallet
- miter saw
- Philips bit
- Sandpaper
- scraper
- Table saw
- Tape measure
- wood fill
Materials Required
- 1-¼-in. 18-gauge brad nails
- 1-¼" exterior wood screws
- 2 - 1x2 x 8 ft. pine boards
- 2 - 1x4 x 8 ft. pine board
- ⅜-in. dowel
- 4 - 2x4 x 8ft. spruce boards
- 5 - 1x6 x 8 ft. pine board
- 6 - 1x6 x 6 ft. pine boards
- Wood glue
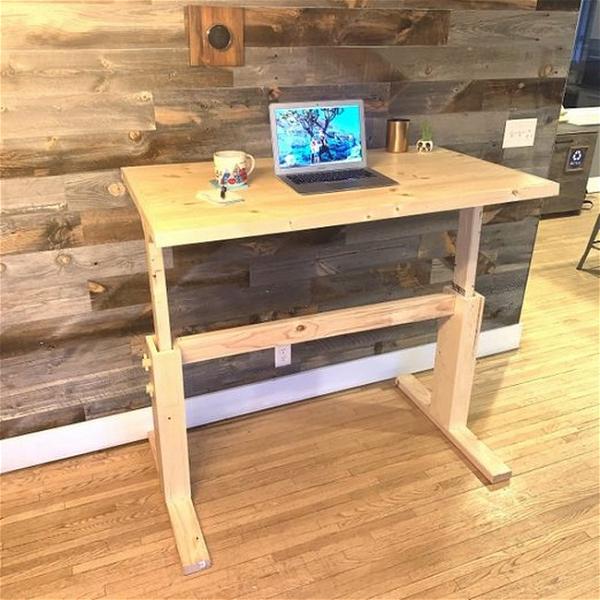
DIY standing desk
A standing desk can help you boost your productivity and improve your posture. Standing all day long will help you keep your back and posture in check, not to mention count those calories. Here’s how to build a sturdy DIY standing desk using inexpensive table legs and a converted board. The kit is easy to install and works on most desks, including timber and steel framed desks. One of the simplest ways to improve your posture is by designing your desk to let you stand tall. The sofa-shaped design offers under-desk storage and adjustable height so it will grow and change with your child.
Skill Level: Beginner
Materials
- Pine or wood of your choice
- Saw
- T-bevel for measuring angles
- Screws
- Felt pieces
- Small level
- Paint
Tools Needed: Screw Driver
Tips: A large part of this plan requires you to have a detachable computer monitor. If you don’t, this is not the plan for you.
Decent Standing Desk
Want to sit less, get more done, and feel better? Decent is the standing desk built for people who sit all day. With Decent, you can instantly adjust your desk to any height and stay comfortable for hours at a time. Its sturdy construction and sustainability-focused design ensure that it'll last for years to come. Decent is an adjustable height workstation for standing or sitting that lets you do what you love, where you love. Its small footprint fits comfortably in your living room, bedroom, or office, and with its unique stand-up desk converter, you can easily enjoy a healthy and comfortable way of working. The Decent is a height-adjustable standing desk that also acts as a room divider. The entire unit can be raised or lowered in seconds while keeping your workspace separate from the rest of the room.
Skill Level: Beginner
Materials: IKEA Lack Side Table, 2 Spruces 2×2, 1 Spruce 1×2, Acrylic Paint
Tools Needed: Screw Driver
Tips: A large part of this plan requires you to have a detachable computer monitor. If you don’t, this is not the plan for you.
DIY Adjustable Standing Desk for under $25
Need a standing desk, but can't afford it or don't want to pay the price on store-bought desks? This awesome DIY adjustable standing desk is the perfect solution. Bring the great outdoors inside: The DIY Adjustable Standing Desk allows you to take your work with you, literally. It converts quickly and easily from a sitting desk to a standing desk, so you can make your day fit your schedule.- Lightweight desk with hidden wheels for simple mobility- Attaches to most surfaces- Multi-functional desktop accommodates laptops or writing surfaces. You can build your own Adjustable Standing Desk using simple tools and techniques outlined in this DIY manual. It's a practical solution for budget-conscious home office workers seeking healthy alternatives to prolonged sitting.
Tools Required
- 1-1/14" spade bit
- ⅛" pre-drill bit
- ⅜" pre-drill bit
- Air compressor
- air nailer
- Drill
- Impact driver
- Mallet
- miter saw
- Philips bit
- Sandpaper
- scraper
- Table saw
- Tape measure
- wood fill
Materials Required
- 1-¼-in. 18-gauge brad nails
- 1-¼" exterior wood screws
- 2 - 1x2 x 8 ft. pine boards
- 2 - 1x4 x 8 ft. pine board
- ⅜-in. dowel
- 4 - 2x4 x 8ft. spruce boards
- 5 - 1x6 x 8 ft. pine board
- 6 - 1x6 x 6 ft. pine boards
- Wood glue
- Tips: A large part of this plan requires you to have a detachable computer monitor. If you don’t, this is not the plan for you.

Conclusion
You can build your own standing desk at home for a fraction of the price. Using simple materials along with a couple of tools, you too can enjoy better health and increased productivity throughout the day! These plans include A brief introduction to interior design, A list of tools and equipment, 14 detailed images showing each step of the process. We hope these plans will help you build a desk that allows you to stand for many hours and is fully adjustable.
See Other Projects