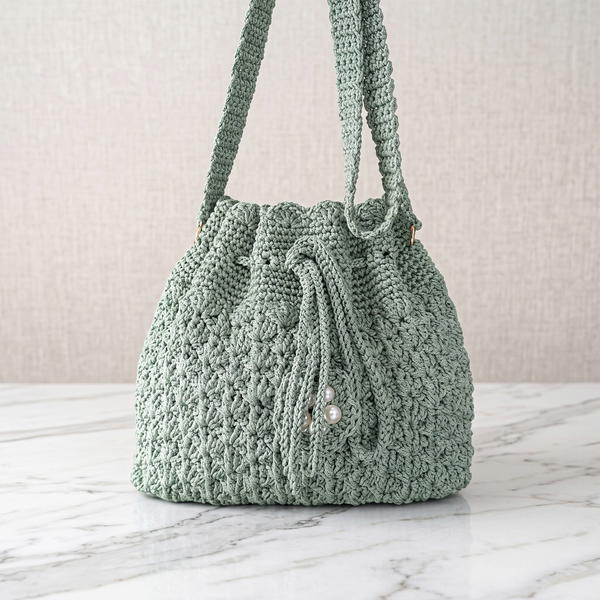
Use this free Crochet Thessaloniki Stitch Bag pattern to work a sturdy and stylish shoulder bag featuring a unique design ideal for daily use.
Special thanks to Örgü ütopyası for the original crochet tutorial that inspired this written version. The Crochet Thessaloniki Stitch Bag stands out with its repeating textured pattern, giving the surface a defined appearance that works beautifully for a shoulder-style accessory.
Unique Crochet Thessaloniki Stitch Bag Free Pattern With Elegant Style
The main body develops through a consistent stitch sequence that creates the recognizable pattern across the fabric. Careful stitch placement and even tension are especially helpful for keeping the texture balanced from one section to the next. The finished dimensions may vary depending on the yarn, hook size, and individual tension.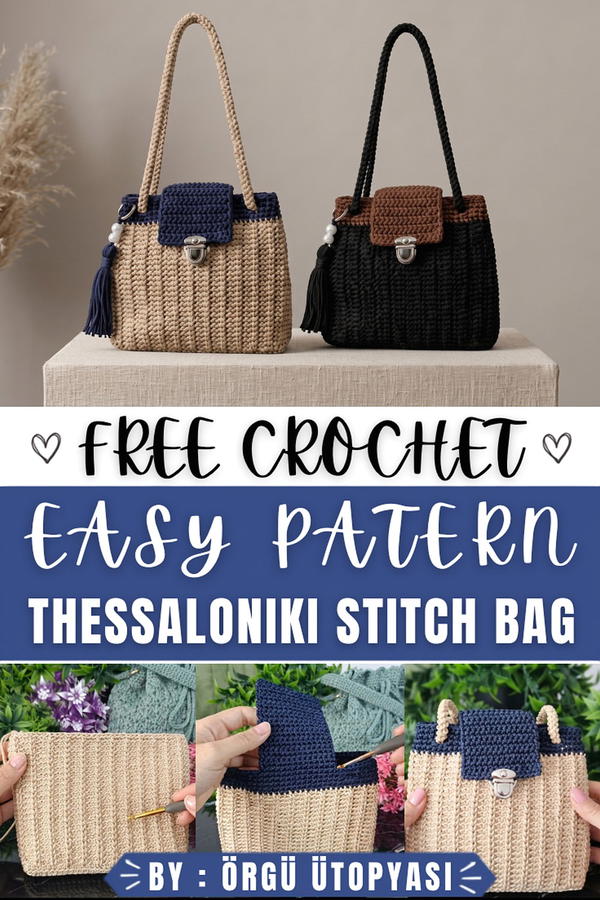 The construction begins with a foundation before the main stitch pattern is established according to the tutorial. Repeating the sequence provides useful practice with maintaining stitch counts and recognizing how each row contributes to the overall texture. The strap and edges are completed afterward to finish the structure of the bag neatly.
Color choice offers an easy way to give the design a different character. A solid shade can emphasize the stitch definition, while coordinating or contrasting colors can highlight selected sections. If a different yarn weight is used, checking the gauge and measurements during the process can help maintain the intended proportions.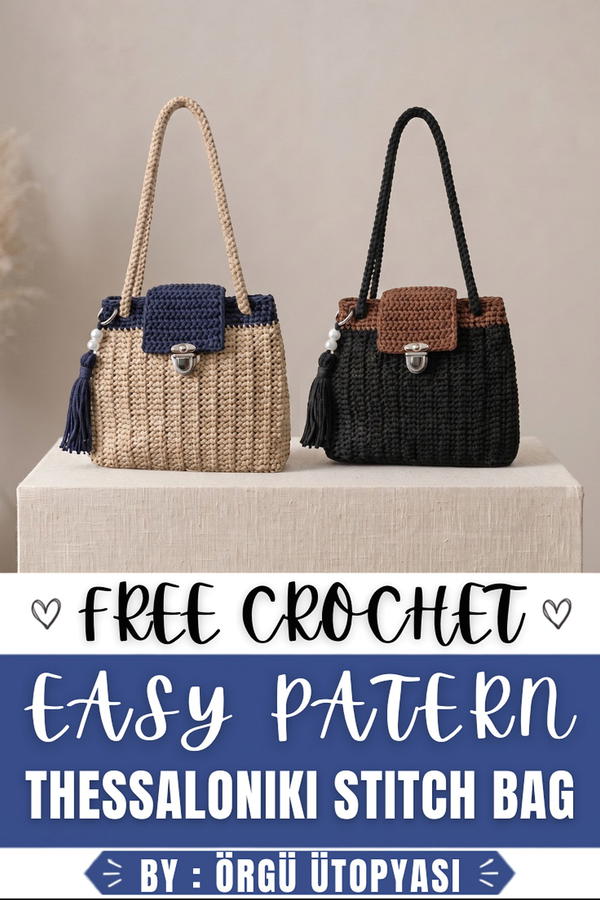 Once finished, the bag provides space for everyday belongings such as a phone, wallet, and keys. Its distinctive surface also makes it an attractive accessory for casual outfits, shopping trips, or other everyday outings.
About the Pattern
This macramé bag design combines structured construction with an elegant textural pattern. The project begins with a solid rectangular base, framing and forming the three-dimensional foundation for a seamless upward transition into the body. The body features a unique “V-pattern” stitch motif, introduced in spiral rounds using back loop single crochet, offering strength and a striking visual effect. Detailed attention at the bag mouth creates practical buttonholes, while the matching lid and handle—secured with a button or switch—add utility and style.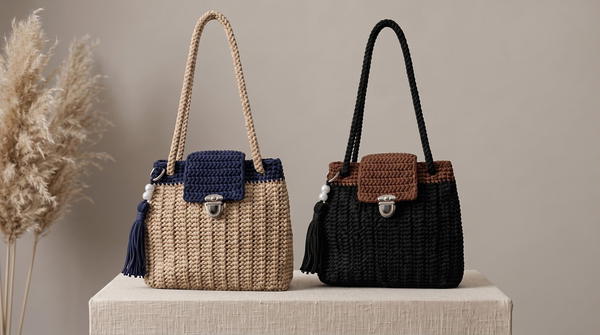
Pattern Basic Points
- Structured rectangular base provides stability and foundation.
- Spiral construction for the main body results in a seamless, robust cylindrical bag.
- Back loop only single crochet and V-pattern motif for the body create texture.
- Integrated color change and buttonhole construction for a functional, durable closure.
- Separate lid worked across the back for a secure cover and harmonious finish.
- Customizable with handcrafted handle and easily adaptable sizing.
Special Notes
- The V-pattern requires careful attention for stitch placement—use of a divider or marker is recommended to keep alignment consistent.
- Spiral construction in the body avoids seam lines; always mark the beginning of each round if needed.
- Accurate corner increases ensure the base remains flat and evenly shaped.
- Buttonhole construction is flexible; modify the number and position to suit personal preference or button selection.
- The change in yarn color at the mouth offers additional stability and a decorative finish; blend colors deliberately for a crisp visual boundary.
Skill Level
Intermediate
The pattern involves techniques such as spiral construction, V-pattern formation, color changes, integrated buttonholes, and assembling functional bag hardware. Experience with structured crochet and accurate stitch placement is recommended for consistent results.
Materials
- Macramé yarn, 3mm thickness, approx. 350–400g (main color + accent color for mouth)
- Crochet hook: 4mm or size required to meet gauge
- Stitch markers or a divider tool
- Buttons or on/off switch closure
- Handle, D-rings, or strap hardware (prepared or purchased)
- Tapestry needle for sewing
- Scissors
Measurements, Gauge & Stitch Pattern
- Base size: Approx. 13 stitches across x 32 rows (yields a base of about 26–28 cm by 6–7 cm, depending on tension)
- Bag height: 22 rows for body, plus 19 rows for lid
- Final measurements: Approx. 28 cm wide x 20 cm tall x 7 cm deep, excluding handle
- Gauge: 12 sc x 12 rows = 10cm x 10cm (single crochet, back loop only, unblocked)
- Primary stitch patterns: Single crochet (SC), back loop only (BLO), V-pattern (detailed below).
Stitch Abbreviations
- ch: chain
- sc: single crochet
- blo: back loop only
- st(s): stitch(es)
- sl st: slip stitch
- V-pattern: (sc, ch 1, sc) in the same stitch
Special Stitches Used
- Back Loop Only (blo): Work into only the back loop of the stitch, leaving the front loop unworked for defined ridges.
- V-pattern: Insert hook into the exact center/SINGLE crochet of previous round, work (sc, ch 1, sc) into that st—this forms a V shape.
- Buttonhole space: (ch 3, skip 3 sts), creates an opening for closure hardware.
Handbag Pattern: Step-by-Step
Round 1 – Base Construction
- Foundation: Chain 13.
- Row 1: Work 1 sc in the second chain from the hook and across (12 sc).
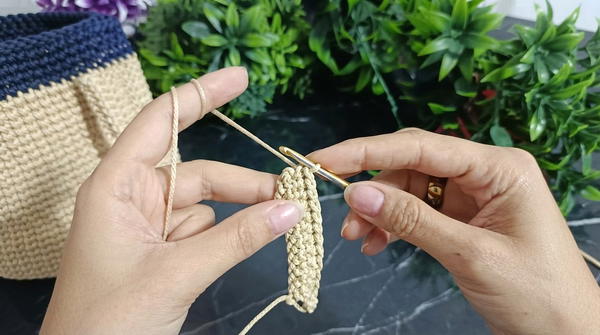
- Rows 2–32:
- Ch 1, turn.
- Work 12 sc across each row.
- Continue this process for a total of 32 rows (forming a rectangle).
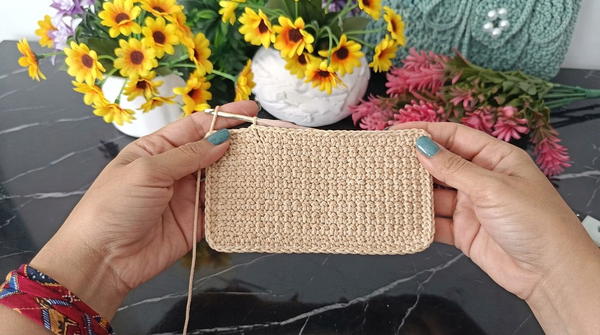
- Framing the Base:
- Do not turn after final row—pivot to work sc evenly around entire perimeter of the base rectangle.
- At each corner, increase with 3 sc into the corner stitch for a smooth, rounded form.
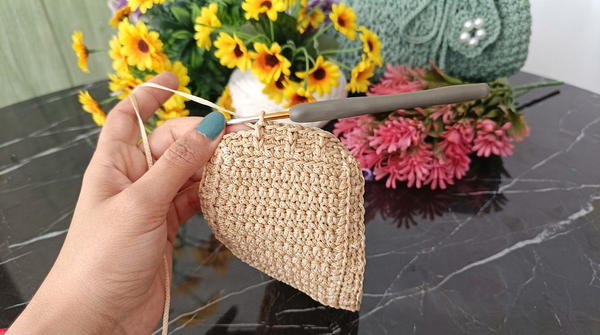
- Join or continue in spiral if desired for a seamless transition to the body.
Round 2 – Body and Model Assembly
- First Body Row:
- With the base now upright, work 1 round of back loop only (blo) sc all around the perimeter.
- Begin V-Pattern Spiral:
- Set up round:
- Work 2 blo sc.
- Work 1 V-pattern into the center of the next sc (insert hook deeply into the center of the stitch below, then [sc, ch 1, sc] in the same stitch).
- Repeat: Continue with 2 blo sc, then 1 V-pattern into every third stitch, all the way around.
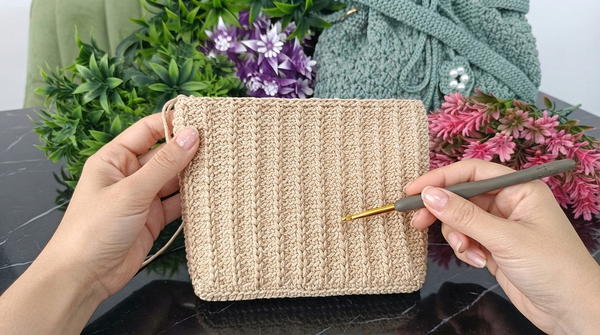
- Use a divider or marker if needed to keep pattern spaced evenly.
- Set up round:
- Subsequent Rounds for Body:
- Continue spiraling up in this pattern; always insert V-patterns directly above the previous V-patterns, with 2 blo sc between each V-pattern.
- Work 22 total rounds for the desired height, maintaining spiral without joining rounds.
Round 3 – Mouth Area and Buttonhole Details
- Color Change: Switch to a new color yarn for the bag’s mouth.
- Work 2–4 rounds of regular sc (through both loops), keeping stitch count even.
- Buttonhole Construction:
- Determine buttonhole placement: evenly spaced around the mouth, chain stitch method.
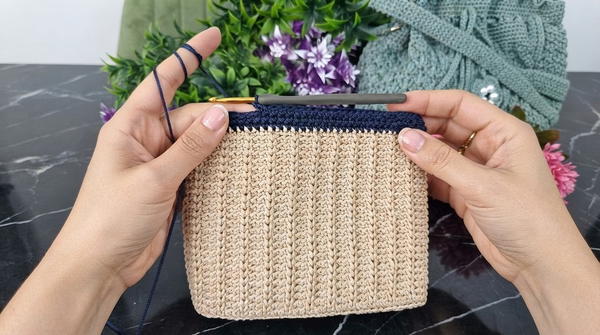
- To create a buttonhole:
- Ch 3, skip 3 sts, sc in next st.
- Repeat for the number of buttonholes required, spacing evenly.
- Determine buttonhole placement: evenly spaced around the mouth, chain stitch method.
- Edging the Mouth:
- On the next round after buttonholes, work 3 sc into every ch-3 buttonhole gap and regular sc in each sc from previous round.
- Complete with 1 round of even sc if desired for reinforcement.
Round 4 – Lid (Cover) Formation
- With bag mouth facing you, locate and mark the center back, then attach yarn.
- Row 1: Work sc across the width of the lid panel (determine lid width—generally matches bag width, approx. same stitch count as base row, usually 12–13 sc).
- Rows 2–19:
- Ch 1, turn.
- Work 1 sc in each st across.
- Repeat for 19 rows for a full, generous lid.
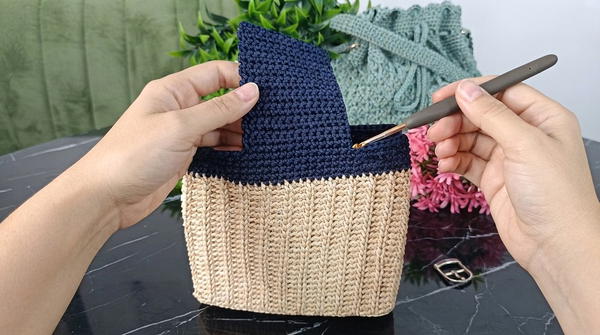
- Fasten off and weave ends.
Round 5 – Closure and Handle Attachment
- Closure: Sew the button or mount on/off switch through the front panel in alignment with the buttonhole on lid.
- Attach handle at the side or top using prepared D-rings, sewn handles, or crocheted straps as desired.
- Reinforce all hardware with several passes of yarn for durability.
Assembly & Finished Size
After all rounds and rows are complete, the handbag should measure approximately 28 cm wide x 20 cm tall x 7 cm deep, though final size may vary with stitch tension and yarn used. The constructed lid fits neatly over the mouth, aligning buttonholes to the closure. The body’s spiral, V-pattern construction results in an elegant texture and lasting strength, perfect for daily use.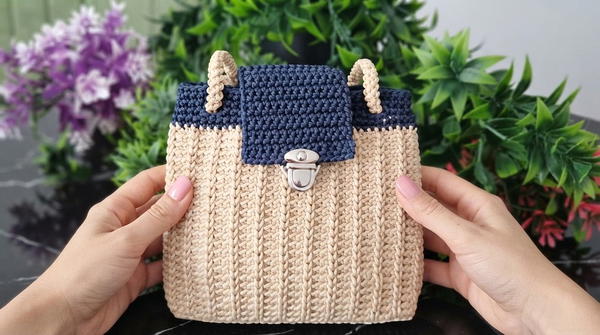
Conclusion
This macramé bag pattern unites clean lines, tactile texture, and sturdy utility with visually appealing V-pattern motifs and practical hardware finishing. The color-changed mouth and crafted buttonholes underscore the hybrid aesthetic—both functional and decorative. With clear rounds and careful assembly, the pattern yields a professional and long-lasting accessory adaptable to personal tastes and needs. The integration of unique stitches and traditional techniques ensures both a rewarding crocheting experience and a durable, modern finished product.